Wheels and Rear Chain
The rear chain was correctly adjusted as regards slack midway between the sprockets- however it could easily be pulled off the sprocket at the rear of the bike- this should simply be impossible and any slackness here can never be corrected by moving the wheel backwards and tensioning the chain between the sprockets. There seemed nothing for it but to renew the chain. I ordered a new B25 chain (5/8 x 1/4 100 links) as this was specified in the parts list and supplied for the B25 by a variety of manufacturers.
Problems! This chain simply wouldn't fit- I couldn't move the rear wheel forward far enough to install it. I tried removing the rear wheel entirely in the hope that I could attach the chain and then fiddle the wheel back in.
 |
| left side rear wheel- the spindle cannot be slid fully forward owing to a shoulder. This is as far as it will go and it wasn't enough to fit the new chain. |
 |
| I removed the rear wheel- starting with the speedo drive on the right shown here and from which... |
 |
| ... I could unscrew the drive cable. |
This bike has a so-called quick release rear wheel. The rear spindle is in two parts and the wheel can be removed by unscrewing the right hand section leaving the left hand end in place. The right hand section can then be pulled out towards the right of the bike. The right-hand axle spacer and speedo drive unit should drop off as the spindle is withdrawn. The wheel itself should then be able to move right and back to detach from the brake hub/sprocket unit and drop out leaving the brake plate, sprocket and hub unit attached to the left hand swinging arm. In theory this doesn't upset the wheel alignment, chain tension or brakes... great! Except that in my case it didn't work: The right hand spindle nut was loosened, but in my case the speedo drive unit was jammed onto the axle and so the axle couldn't be withdrawn towards the right as intended. Instead I had to remove the wheel entirely, including the brake hub/sprocket. I unscrewed the torque arm from the sw arm and unfastened the left hand (brake plate retaining) spindle nut. In order to remove the rear wheel its a great idea to raise the bike by putting blocks under the centre stand.
 |
| Brake backplate on removed wheel. |
 |
| Wheel spindle assembly, from the right- note fixed end with nut and tommy bar hole. Inboard of this comes the adjuster and gap for the sw arm fork. There is a spacer inside the arm- which is a bit rusty and then the speedo drive itself which locks onto two driving slots in the rear wheel centre. Inside the wheel is a spacer shown here (note orientation- it will not fit the other way around, and the rest of the RHS spindle. This spindle screws inside the left hand "dummy axle" section which is consequently thicker as shown above. There is a second spacer on this thicker section that fits into the sprocket drum to close the oil seal. The threaded section on the left emerges through the brake backplate and sw arm left fork. Outside of the sw arm it carries the second wheel adjuster and a cap nut. This cap nut retains the brake plate but doesn't usually need to be removed to take the wheel off. It came off in this case only because I couldn't pull the axle out to the right of the wheel. |
 |
| Close up of RHS speedo drive note orientation of spacer inside seedo drive. |
 |
| Two shots showing how the composite rear axle fits into the sw arm forks. |
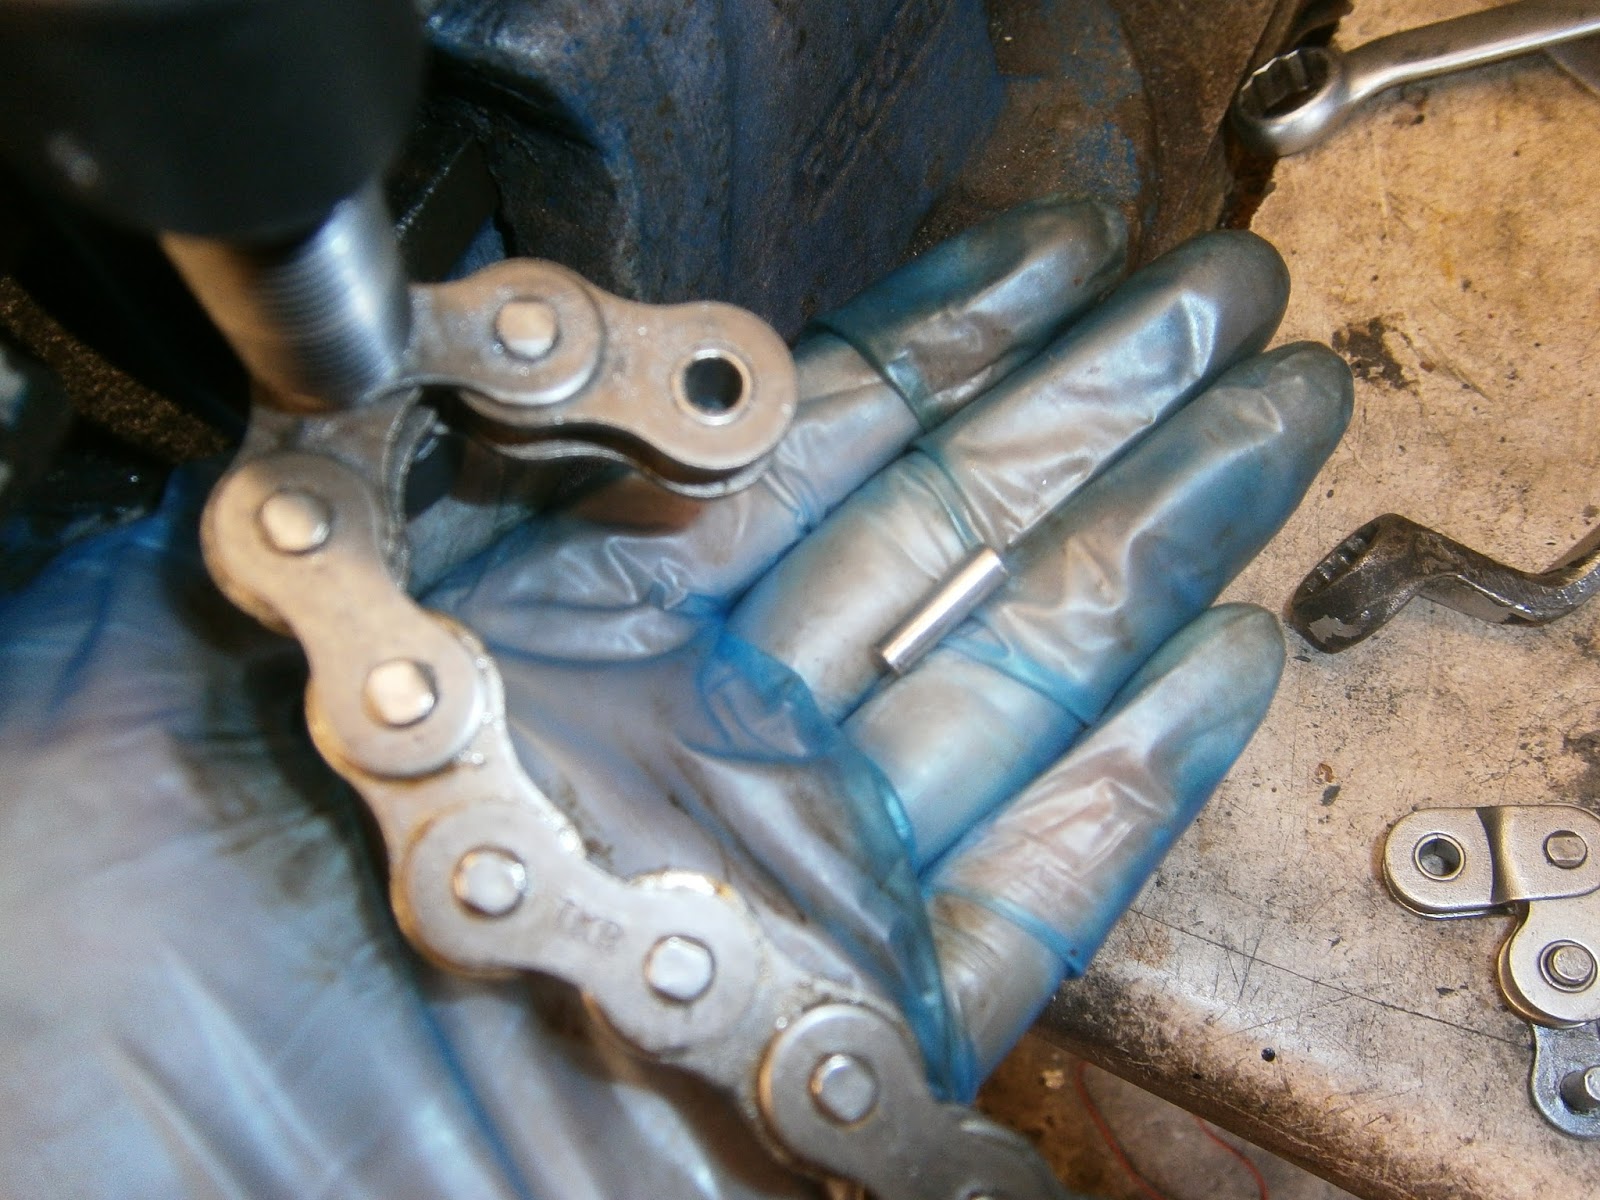
However, even removing the wheel didn't allow me to fit the chain. I double checked the length and... oops! I hadn't realized that chain lengths specified in the catalogues include the removeable link- I hadn't counted this when I had checked my own chain and including it means that I require a 101 link chain! This is apparently specified for the Fleetstar as opposed to the Starfire (which does use a 100 link chain) although this fairly important fact isn't mentioned in either the '68 or '69 B25 parts lists and nor is it mentioned in the Fleetstar supplement... so who knew! Luckily the supplier was able to send an addition link to allow me to extend the chain. I show here a photograph of my original chain (lower) which has a cranked link inserted giving a total length of 101 rollers and presumably 100.5 links?? The new chain is shown above where the cranked link is clearly missing. Hopefully I will now be able to reassemble the bike!
 |
| Original chain (lower) and new chain (upper) Note cranked link and extra roller pin in the old chain. |
Well the extra link duly arrived and I used a Sealey Chain breaker rivetter to remove the old and install the new (plus extra pin). This tool comes with its own instructions but those from Motion Pro for their equivalent tool are much better- you can find them here:
http://www.motionpro.com/images/documents/08-0058.I8-0058.pdf
The tool is identical.
 |
| This is the link in the new chain that needs to be removed and below is the new link and cranked link that needs to be inserted to lengthen the chain by one pin |
 |
| I used a Dremmel to grind around the pin to be removed to take off the "mushroom" flare that holds the pin in- this should make the pressing out easier |
 |
| Assemble the link breaker using the right sized pressure pin as in the instructions- screw in the top bolt to press out the link which will... |
 |
| Fall out from the base of the chain |
 |
| This is the links separated and the new ones with the soft link to be fitted instead |
 |
| Here soft link in position |
 |
| and plate loosely installed over the top |
 |
| The rivetter is reassembled using the grooved and holed plates to press the top plate onto the soft link. I measured the width of most links as 0.6" and pressed the new plate on to a similar dimension.. |
 |
| Installed plate- soft link projects above the new plate so that... |
 |
| It can be flared with the rivetter once the tool has been modified to substitute the anvils for the two plates. |
 |
| Completed chain with new links rivetted in. |
 |
| Both ends of the new chain now join-able with the split link. |
Once the chain was extended, I needed to lube it before installation. The one word/phrase missing from the pack when I got this chain was "O-ring" so I assumed that this is a somewhat old-fashioned chain lacking O-rings. This proved to be correct, but it does mean that lubrication is more crucial. The following is a method for greasing non O-ring chains, it does no harm to O-ring type but I doubt it does that much good either. Before lubing the chain I cleaned off the transport grease using chain cleaner and a fluff-free rag.
 |
| In the old days this stuff was called "Linklyfe"... can't get it now, but this Putoline chain wax seems to be the same stuff.- Stick it on the stove to melt the grease- do this when no-one else is in and don't tell anyone. It can smell a bit- be careful to clean up any spills. |
 |
| Molten and gloopy |
Carry the tin carefully back to the workshop- put some paper down! Tie a string through one end of the chain
 |
| Using the string lower the chain into molten grease, swirl gently and allow to remain immersed in the grease for at least 10 mins. |
 |
| Bubbles will rise... |
 |
| Lift out the chain using the string and hang it vertically to drip the excess grease back into the can- this will be messy- remember the newspapers... The grease will set on the chain fairly quickly and dripping will stop. |
 |
| Add caption |
Having modified and now greased the chain I was able to install it easily- the two ends lined up beautifully on the sprocket.
 |
| Chain aligned on rear sprocket |
 |
| Install cover plate and finally... |
 |
| Fit split link with closed end facing the direction of movement in normal riding. |
The next problem is to set the wheel alignment. This really needs to be done a few times at each stage but at present- with the brake backplate not fully tightened I checked it anyway using a chain alignment gauge. This clips onto the rear sprocket and the guide rod should then run along parallel to the run of the chain- as here. I had by now cleaned the threads of the adjusters and their nuts so I could just nip them up to the adjusting plates to hold the wheel in this position.

I will recheck as I tighten all the bolts. Finally I managed to get hold of an original B25 chainguard as this bike had a pattern part. The design underwent a change in 1969 so the guard that my bike should have was only made for a year. This is probably because the mountings (one at the front and one midway along the guard) allowed too much vibration and so the darn thing always cracked. Consequently there are very few of those around, but you can still get the later type in which the rearmost mounting was moved right to the rear of the chain. This needs a new mounting hole (two actually) in the rear sw arm behind the shock absorber mounting. I drilled and tapped one hole to make sure that the guard would fit (it uses the same front mount).
The guard fitted well although I did need to bend it slightly to prevent the chain making contact at the front.


No comments:
Post a Comment
Usual disclaimers! I' m not a mechanic and these blogs are really just documenting my progress. They are neither a recommendation nor an instruction manual. Just my notes for what I did and how Id do it next time. Im always happy to receive suggestions and corrections to any of the processes described here- hey its a learning process for me too! Feel free to contribute...